
ZRAY Maintenance Guide: How to Clean Hot-Melt Glue Nozzles on Case Formers (150-170°C, 8-15 min) | ZRAY
A blocked hot-melt nozzle is the most common reason a glue-applied case former goes down in the middle of a shift. The symptoms are always the same: glue bead width drops below 3 mm, the bead drifts sideways, the box flaps lift at the compression station, and the machine starts tripping GLUE_PRESSURE_LOW alarms even though the tank is full.
Cleaning a nozzle is not a mystery. It is a defined procedure with defined timing, and if your team does it on a schedule instead of reacting to failures, you will cut glue-related downtime by roughly 70%. We set up hot-melt systems at 150-170°C on our case formers, and this guide is the exact procedure our field engineers use on customer lines, including for the lines behind Mars and Duracell.
Why Nozzles Block in the First Place
Hot-melt adhesive does not fail suddenly. It degrades gradually, and the degradation is chemical, not mechanical:
- Thermal oxidation: the adhesive surface in the tank oxidizes whenever the lid is open. Oxidized adhesive forms char and skin, which migrates to the nozzle.
- Heat exposure time: EVA-based hot melts held above 170°C for long idle periods crosslink and darken. Dark, brittle adhesive is degraded adhesive.
- Dust and fiber contamination: corrugated board dust, especially from recycled board with high ash content, is pulled into the nozzle orifice by the vacuum of the glue pump.
- Incorrect set temperature: running below 150°C leaves the adhesive partially uncured, and the semi-molten fraction builds up inside the nozzle bore.
The blocking sequence is predictable: first the bead narrows, then it streaks, then the nozzle spits and skips, and finally it blocks completely. By the time the nozzle blocks, the char has been contaminating your joints for hours.
The Right Cleaning Method for Each Situation
There are three levels of nozzle cleaning, and most plants use the wrong one at the wrong time.
Level 1: Routine flush (every shift change or daily)
- Lower the glue tank temperature to 150°C and hold for 10 minutes.
- Purge the line with a neutral purge compound according to the compound manufacturer’s ratio. We standardize on a 3% purge compound concentration.
- Open the nozzle block and run the pump for 15 seconds to push degraded adhesive out.
- Wipe the nozzle face with a lint-free cloth. Do not use wire brushes on the orifice face.
- Close and run three test cycles. Check that the bead width returns to the setpoint of 8-12 mm for a typical case flap.
Level 2: Nozzle soak (monthly or when a nozzle spits)
- Remove the nozzle block; allow it to cool to under 100°C.
- Disassemble the block and soak the nozzles in hot-melt cleaner or mineral oil at 120-150°C for 30-45 minutes.
- Clean the bores with the correct-size cleaning wire. Never ream with a drill bit.
- Check the O-rings for flat spots and replace any that show wear. A worn O-ring is a leak point, and leaks cause cold adhesive strings.
- Reassemble, pre-heat to 160°C, and purge before production.
Level 3: Ultrasonic cleaning (quarterly or after a full block)
- Disassemble the nozzle and O-rings.
- Run the nozzle body in an ultrasonic bath with hot-melt cleaner at 80°C for 20 minutes.
- Dry and inspect the orifice under magnification. If the orifice is scored, replace the nozzle; rescuing a scored nozzle wastes more time than it saves.
- Reassemble with new O-rings and purge before restart.
Two things we never do: never poke a cold nozzle with steel wire, and never leave a blocked nozzle in place “to soften up” overnight. Both damage the orifice geometry and guarantee a return visit.
Tools and Consumables for the Job
Keep a dedicated cleaning kit at the machine. The kit we ship with every glue-applied ZRAY case former contains:
- Lint-free cloths and cotton swabs
- Nozzle cleaning wires in orifice sizes (typically 0.5-1.2 mm)
- Hot-melt purge compound
- High-temperature hot-melt cleaner
- Spare O-rings for the nozzle block
- Spare nozzles (recommended stock: 2-4 per machine)
- A thermometer to verify actual adhesive temperature
Buy nozzles from the original equipment supplier. Third-party nozzles with a different internal bore angle change the bead geometry and the pull-off characteristics, and you will spend a shift troubleshooting a “glue problem” that is actually a nozzle geometry problem.
PLC Alarms and How to Respond
On our machines, glue system problems surface as these alarms on the HMI:
| Alarm | Meaning | First check | Fix step |
|---|---|---|---|
| GLUE_TEMP_LOW | Tank or hose temperature below setpoint | Heater, thermocouple, tank level | Verify setpoint is 150-170°C; check the thermocouple seat; restart the heater |
| GLUE_PRESSURE_LOW | Pump pressure below setpoint | Nozzle block, filter, pump wear | Clean nozzle block and filter first; only then suspect the pump |
| NOZZLE_BLOCKED | No adhesive flow detected at the nozzle | Orifice, adhesive char | Soak per Level 2 or ultrasonic per Level 3 |
| TANK_LEVEL_LOW | Adhesive below minimum level | Tank, pellets | Refill and note the refill interval; a short interval points to a leak or oversized nozzle |
Rule from the field: GLUE_PRESSURE_LOW is a nozzle problem until proven otherwise. The filter and nozzle block are 70% of the causes. Do not replace the pump before cleaning the block.
Preventative Maintenance Schedule for the Glue System
| Interval | Task |
|---|---|
| Daily | Check tank level; wipe nozzle face; verify bead width on a test case; log tank temperature |
| Weekly | Purge the line (Level 1); check hoses for leaks and cold spots; verify setpoint vs. measured temperature |
| Monthly | Nozzle soak (Level 2); replace worn O-rings; inspect pump filter; check the glue filter element |
| Quarterly | Ultrasonic cleaning (Level 3); inspect heater and thermocouple; calibrate temperature display against a handheld thermometer |
| Half-year | Replace nozzles as a set; replace pump seals; full tank drain and manual char removal |
Keep a temperature log. If the measured tank temperature drifts more than 5°C from setpoint, the thermocouple is degrading and will cause a false GLUE_TEMP_LOW alarm within weeks.
Technical Reference: Glue System Parameters on ZRAY Case Formers
| Parameter | Value |
|---|---|
| Adhesive type | EVA-based hot melt, pellet or granule form |
| Tank temperature setpoint | 150-170°C |
| Hose temperature | equal to tank setpoint |
| Nozzle temperature | equal to tank setpoint |
| Glue bead width (setpoint) | 8-12 mm on case flaps |
| Adhesive open time | 3-5 seconds typical, match to line speed |
| Air supply | 0.5-0.7 MPa |
| Warm-up time from cold | 25-30 minutes |
| Nozzle cleaning time (Level 1/2/3) | 8-15 min / 30-45 min / 20 min ultrasonic |
| Changeover time | 10-15 minutes |
These numbers are what we verify at FAT and support after delivery. If your adhesive supplier recommends a different temperature window, run a joint-strength test at your actual line speed before committing; the board grade changes the optimum.
Cold Starts and Adhesive Storage: Two Factors Nobody Logs
Cleaning keeps the nozzle clean, but two habits decide how often you have to clean it.
The cold-start sequence
A glue system run up from cold is where most pump damage happens. The wrong sequence is: switch on the heater, wait until the display shows setpoint, and start the pump. The display shows the tank temperature, not the temperature of the adhesive near the pump inlet. Cold adhesive at the pump inlet damages the gear teeth and pushes unmelted pellets into the line.
The sequence we use on every startup:
- Switch on the tank, hose, and nozzle heaters.
- Hold at setpoint (150-170°C) for 10 minutes before the first pump start.
- Purge 200-300 g of adhesive through the line to push out the material that sat in the hoses overnight.
- Check the bead on a test case before starting production.
Log the cold-start curve once a week: time from switch-on to setpoint, then time to a stable bead. If the warm-up time drifts by more than 5 minutes from your baseline, the heater or the thermocouple is degrading, and you will see a false GLUE_TEMP_LOW alarm within a few weeks.
Adhesive storage and turnover
EVA pellets are hygroscopic. An open bag left in a damp warehouse absorbs moisture overnight, and that moisture becomes steam bubbles in the melt. The bubbles pop at the nozzle and leave a spitting bead pattern that looks exactly like a blocked nozzle. Store pellets sealed, at 15-30°C, dry, and work on first-in-first-out rotation: pellets older than the date on the bag go back to the supplier or to a less critical line.
When to Upgrade the Glue Capacity
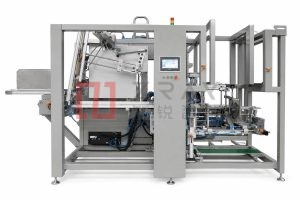
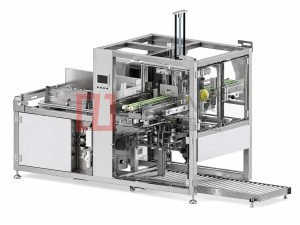
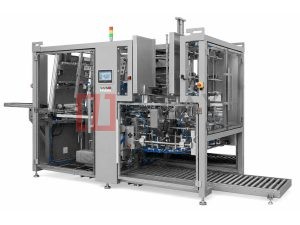
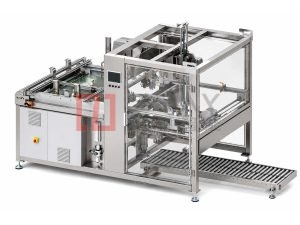
If you run 500,000+ cases per year, the glue system on a standard single-head erector is sized for continuous duty, but the nozzle cleaning cadence becomes the bottleneck. On the Double-Head High-Speed Case Former, the two heads can be cleaned alternately: one head runs while the other is purged, so you never stop the line for a nozzle. For lower-volume lines, the Single-Piece Case Erector uses the same nozzle block family, so your spare parts stock stays small and the cleaning procedure is identical.
Cleaning Mistakes We See on Real Lines
- Poking a cold nozzle with wire: scratches the orifice and changes the bead geometry permanently.
- Flushing solvent through a hot tank: the solvent vaporizes and flashes; use only approved purge compounds at 120-150°C.
- “Solving” a blocked nozzle by raising the tank to 180°C+: this accelerates adhesive degradation and brings the next blockage closer.
- Reusing old adhesive after a long stop: the top layer in the tank is oxidized; before a long stop, lower the tank temperature to 130°C.
Get the Procedure, Then Ask Us Anything
Nozzle cleaning is routine, but the details decide whether it takes 8 minutes or a full shift. If you want our documented cleaning procedure with the exact purge ratios and torque values for your machine, or if you have a glue failure that does not match any of the cases above, write to us.
- Email: [email protected]
- WhatsApp: +86 13681839278
- Or fill in the inquiry form: Contact ZRAY
We answer every inquiry within 24 working hours. Send us a photo of the nozzle face and the HMI alarm code, and our engineers will tell you which level of cleaning your machine needs.
Want To Know More About Our Upgraded Machines?
Send your carton specifications and output demand, our engineer will provide free technical scheme & quotation
Latest Products
Subscribe To Get Latest News & Technical Guides
Leave your business email to receive free industry articles and new product updates