
Hot Melt Nozzle Adjustment on Carton Erecting Machines (150-170 °C, 0.3 MPa) | ZRAY
A clean glue bead is a tuning result, not a factory default. On a carton erecting machine, the hot melt nozzle does three jobs at once: it meters adhesive, places it on the flap, and keeps the head from stringing or dripping between cycles. When the nozzle is off by a couple of millimeters or the temperature drifts a few degrees, you get one of three failures — strings that wrap around the mandrel, misses that open during transit, or a plugged nozzle that stops the line. This guide gives you the reference values and the adjustment sequence we use on ZRAY machines, so your team can set the nozzle once and stop fighting glue.
The Reference Values That Matter
Write these on the machine frame. They are the starting point for every nozzle setup on a ZRAY carton erecting machine:
| Parameter | Reference value |
|---|---|
| Hot melt tank temperature | 150–170 °C |
| Applicator head temperature | 155–165 °C |
| Adhesive pressure at nozzle | 0.3–0.6 MPa (start low, raise only if needed) |
| Nozzle-to-flap gap | 2–4 mm |
| Nozzle height above flap plane | level with flap surface, +0–1 mm |
| Nozzle angle to flap | 90° perpendicular, ±2° |
| Open time per cycle | 80–150 ms, tune by case speed |
| Typical bead width | 3–6 mm on corrugated |
Set temperature first, always. A cold tank with a hot recipe is the single most common cause of “glue looks wet but does not stick.”
Step-by-Step Nozzle Adjustment
Run this sequence after any nozzle change, after board grade changes, and during the morning warm-up:
- Warm up fully. Let the tank reach setpoint and hold for 10–15 minutes. Purge 20–30 g of adhesive through the nozzle into a waste pad so the tip is truly at temperature and free of char.
- Position the head. Set the nozzle-to-flap gap at 2–4 mm and the height so the bead lands at the flap center line, not on the fold edge. A bead on the fold edge is a bead that breaks when the case is squared.
- Set the angle. Perpendicular to the flap (90°) is the default. If you must angle the nozzle, keep it within ±2° — beyond that, the bead smears instead of laying down.
- Adjust pressure. Start at 0.3 MPa. Increase in 0.05 MPa steps only if you see a thin or intermittent bead. Do not chase stringing with pressure — that is a temperature or retraction problem.
- Set open time by running 10 consecutive cases and inspecting the pattern. Bead should start and stop cleanly at the flap edges; over-run means too long an open time.
- Verify bond: fold the flap, hold 2–3 seconds, peel. You want fiber tear (the liner tears, not the glue line). If the glue pulls clean, raise tank temperature 3–5 °C.
- Log the values in the recipe on the HMI. If the machine is multi-size, each format gets its own nozzle coordinates.
How Board Grade Changes Nozzle Settings
Different corrugated absorbs and conducts heat differently, so the same nozzle setpoint does not behave the same on every board:
| Board type | Thickness | Effect on glue | Adjustment |
|---|---|---|---|
| Single wall E flute | 1.5–1.8 mm | Thinner flap heats fast, bead sets quickly | Open time at the low end; watch for bleed-through |
| Single wall B flute | 2.5–3.0 mm | Balanced | Use reference values as-is |
| Single wall C flute | 3.5–4.0 mm | Thicker liner takes heat away | Raise tank 3–5 °C; slightly longer open time |
| Double wall BC | 6–7 mm | High heat draw, long bond time | Raise temperature, slow the compression/transfer speed |
| Double wall EB | 4.5–5.5 mm | Good surface, strong bond | Standard settings; verify gap — thick board can graze the nozzle |
If you run heavy double wall BC/EB (400–500 gsm), check nozzle clearance at the machine’s lowest forming point; a 6–7 mm board passing under a nozzle set for 3 mm board will hit the tip.
The Three Glue Faults and How to Read Them
Stringing (threads between case and nozzle). Causes, in order of likelihood: temperature too low, retraction (suck-back) set incorrectly, nozzle too far from flap. Fix temperature first, then check suck-back.
Missed or intermittent bead. Either the nozzle tip is partially plugged with char, the filter is clogged, or the adhesive pressure is too low. Clean the tip with a brass brush, replace the filter element, re-verify pressure.
Beaconing / dripping between cycles. Tank temperature too high or nozzle not seated in its retaining nut. Confirm temperature is not above 170 °C, then re-seat the nozzle.
PLC Alarm Codes Around the Glue Module
| Code | Alarm | Fix |
|---|---|---|
| 312 | Glue Temp Low | Wait for recovery (5–10 min); check heater and thermocouple |
| 314 | Glue Temp High | Check thermostat; clean tank; reduce setpoint if mis-set |
| 316 | Glue Level Low | Refill tank before it drops below pump inlet |
| 318 | Glue Pressure Abnormal | Replace filter, clean nozzle, check pump |
| 322 | Nozzle Plugged | Clean tip, purge adhesive, replace if worn |
Do not clear these and keep running. A plugged nozzle at 30 CPM means every case from that moment is missing adhesive on one flap — you will find out at the customer’s dock, not on your line.
Daily Nozzle Care That Costs Five Minutes
- Wipe the nozzle tip after each shift end while the head is still warm. A small brass brush on dried adhesive beats scraping cold char.
- Do not let the head idle overnight at high temperature with adhesive in it. If the line stops for more than 8 hours, lower the tank to a standby temperature (around 100–120 °C) or follow the manual’s shutdown procedure.
- Check the adhesive batch. EVA hot melt for case erectors typically runs 150–170 °C, but different suppliers quote different windows. Match the machine setpoint to the adhesive datasheet, not the other way around.
- Inspect nozzle wear every quarter. A worn nozzle changes bead geometry and causes stringing no matter what you do to pressure or temperature.
Technical Parameters for the Glue Module
| Parameter | Value |
|---|---|
| Tank capacity (typical) | 5–8 L depending on config |
| Tank temperature | 150–170 °C |
| Adhesive pressure | 0.3–0.6 MPa |
| Air pressure (machine) | 0.5–0.7 MPa |
| Glue open time | 80–150 ms |
| Bead width | 3–6 mm |
| Melt type | EVA hot melt (standard) |
Maintenance That Keeps the Bead Clean
| Interval | Task |
|---|---|
| Daily | Wipe nozzle tip; check bead on first 3 cases |
| Weekly | Purge 30 g through each nozzle; check filters |
| Monthly | Clean tank, replace tank filter, verify temp against reference thermometer |
| Quarterly | Inspect/replace nozzles; check hoses and seals for leakage |
| Semi-annual | Full pump and applicator service; recalibrate temperature sensors |
Choosing and Replacing Nozzle Tips
Nozzle tips are wear items with a defined geometry, and the tip model is part of your glue quality. Three rules:
- Match the tip to the adhesive and board. Narrower tips (0.5–1.0 mm orifice) suit thinner board and finer bead patterns; wider tips (1.0–1.5 mm) suit heavy single wall and double wall where you want a wider bond line. Do not swap tip models without re-tuning pressure and open time.
- Replace in sets. If one head runs multiple nozzles, replace all tips on that head at once. A worn tip next to a new tip gives an asymmetric bead that looks like a machine alignment problem.
- Inspect before every quarterly service. Look for orifice wear (visible as a larger, ragged bead) and carbon buildup inside the tip. A tip that was cleaned aggressively with a wire brush is often worn beyond spec even if it looks fine.
Keep a spare tip set per head in stock. At 30 CPM a 15-minute tip swap beats a 2-hour struggle with stringing any day.
Bond Verification on the Production Floor
A clean bead is necessary but not sufficient — the joint has to hold. Use these tests as part of your first-case check and your weekly routine:
- Peel test: fold the flap, hold 2–3 seconds, peel. You want fiber tear on at least 70% of the glued area for single wall. On heavy double wall, partial fiber tear is acceptable if the peel is clean and the adhesive stays cohesive.
- Gravity / transit check: for the first 20 cases of a new recipe, let the case sit upright for 5 minutes, then tip it. A bottom seal that opens under its own content weight is an immediate reject of the recipe.
- Cold test (cold-chain plants): for frozen-food lines running at −18 °C, test one sealed case at temperature. EVA hot melt embrittles below its softening point; if the joint fails cold, you need a cold-grade adhesive or a different setpoint window.
- Humidity note: high-moisture board (>8% moisture content) slows bond development. If your board supplier changes liner, re-run the peel test before the full batch.
Log the results in the HMI recipe notes. On the next format recall, the operator sees the last verification date and knows the recipe is trustworthy.
Get the Glue Right Once
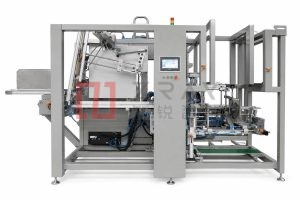
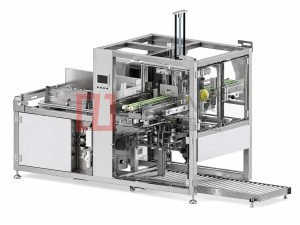
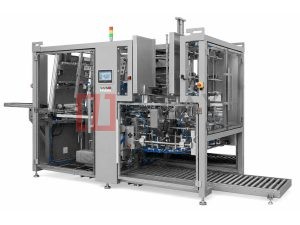
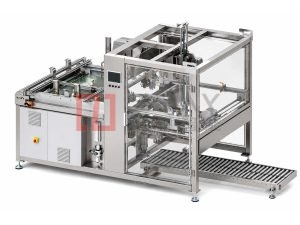
If you are setting up a new line or fixing an existing one, the machine choice matters as much as the nozzle setting. The Single-Piece Case Erector ships with a hot melt module tuned to your board range, and the Double-Head High-Speed Case Former carries an applicator per head so high-speed runs never starve a nozzle. Send us your adhesive datasheet and board grades with the inquiry, and we will return the exact starting setpoints for your recipe.
Need a Setpoint Sheet for Your Board Mix?
Email your board grades and adhesive brand, and our engineers will send a starting setpoint sheet (temperature, pressure, open time) for each format. Replies within 24 working hours.
- Email: [email protected]
- WhatsApp: +86 13681839278
- Inquiry form: https://www.cartonerecting.com/en/contact/
Want To Know More About Our Upgraded Machines?
Send your carton specifications and output demand, our engineer will provide free technical scheme & quotation
Latest Products
Subscribe To Get Latest News & Technical Guides
Leave your business email to receive free industry articles and new product updates